If you’re a savvy Disney World traveler, you saved yourself time and hassle by purchasing your Disney World theme park tickets through a travel agent and are now wondering how to link tickets to your My Disney Experience account. Luckily, this is one of the easier things to do in My Disney Experience, so we’ll walk you through the process of linking theme park tickets to your MDE account.
How to Link Your Tickets to Your My Disney Experience Account
Before starting to link your tickets to your My Disney Experience account, you must have first linked your travel partners. That means, if you’re traveling with Jane and Jack, and they have their own MDE account, they must be linked to yours and have provided permission for you to make plans for them.
If the guests traveling with you do not have their own MDE account, you must first enter them as guests traveling on your reservation in order to link tickets. To properly set up your account, see our blog on My Disney Experience. Otherwise, keep reading.
1. The first step in linking your tickets to My Disney Experience is to log into your account. You will be taken to the options screen.
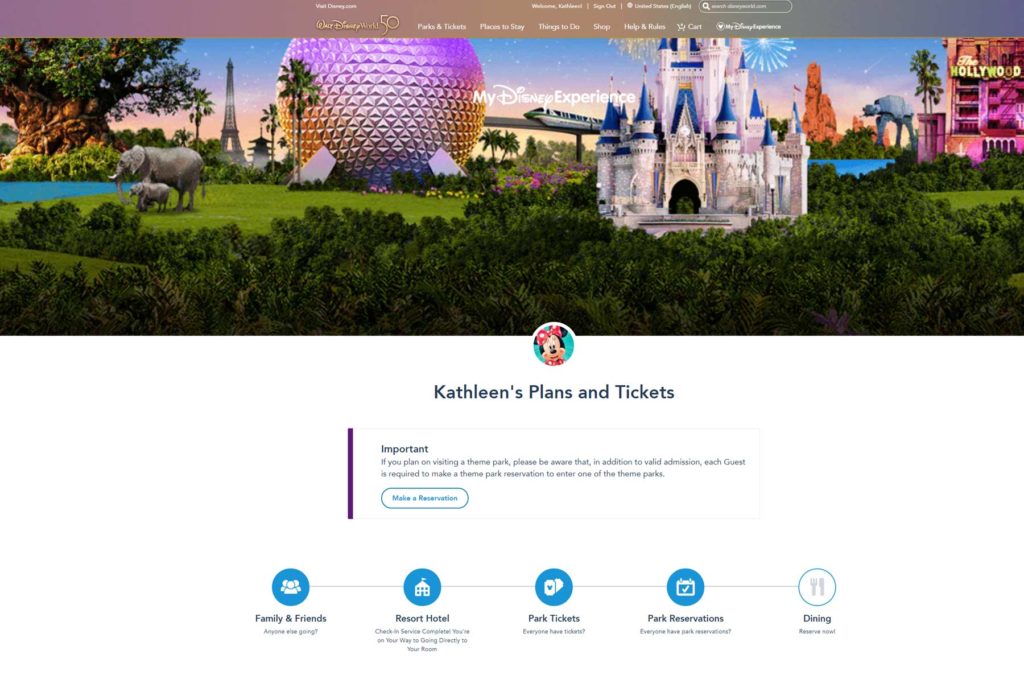
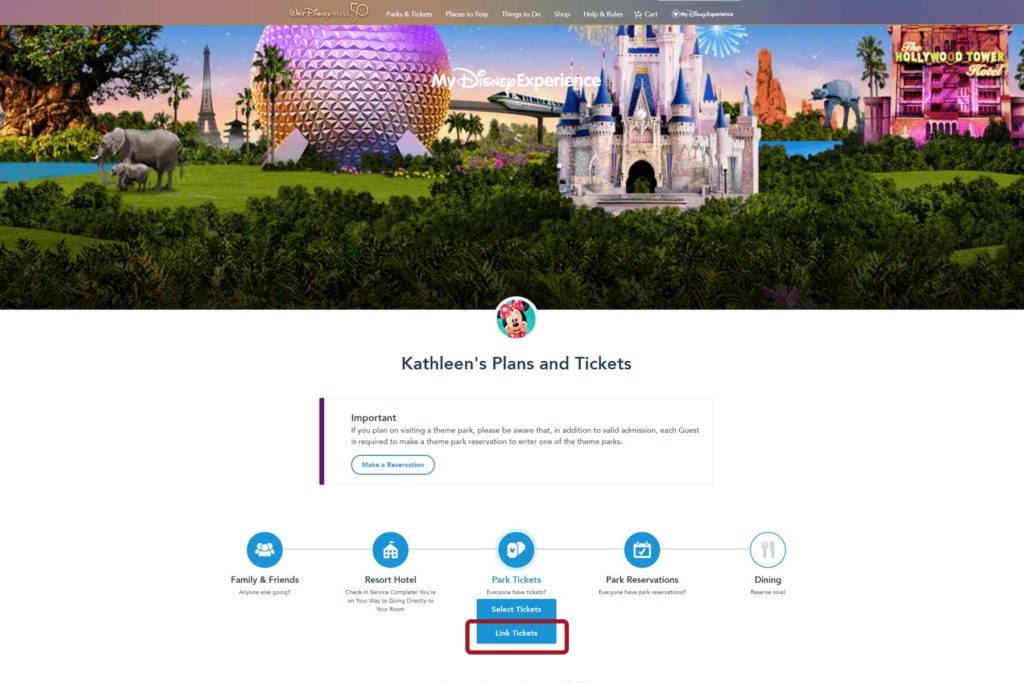
2. Hover over Park tickets. Two options will appear: Select Tickets and Link Tickets. Click on Link Tickets.
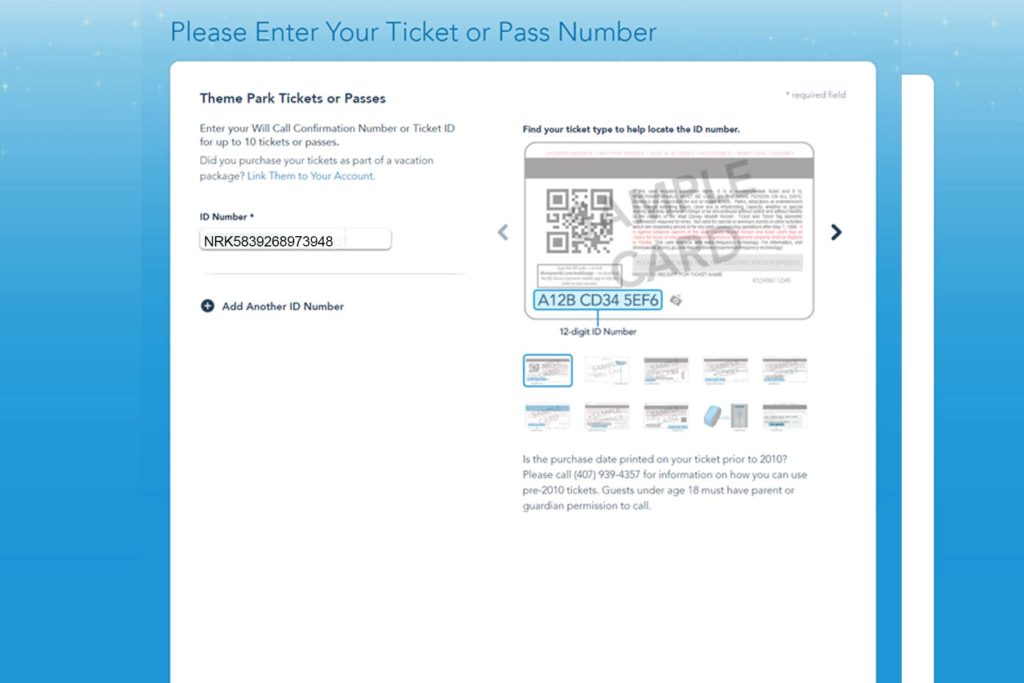
3. You will be taken to the following screen asking you to enter the numbers located on your Ticket.
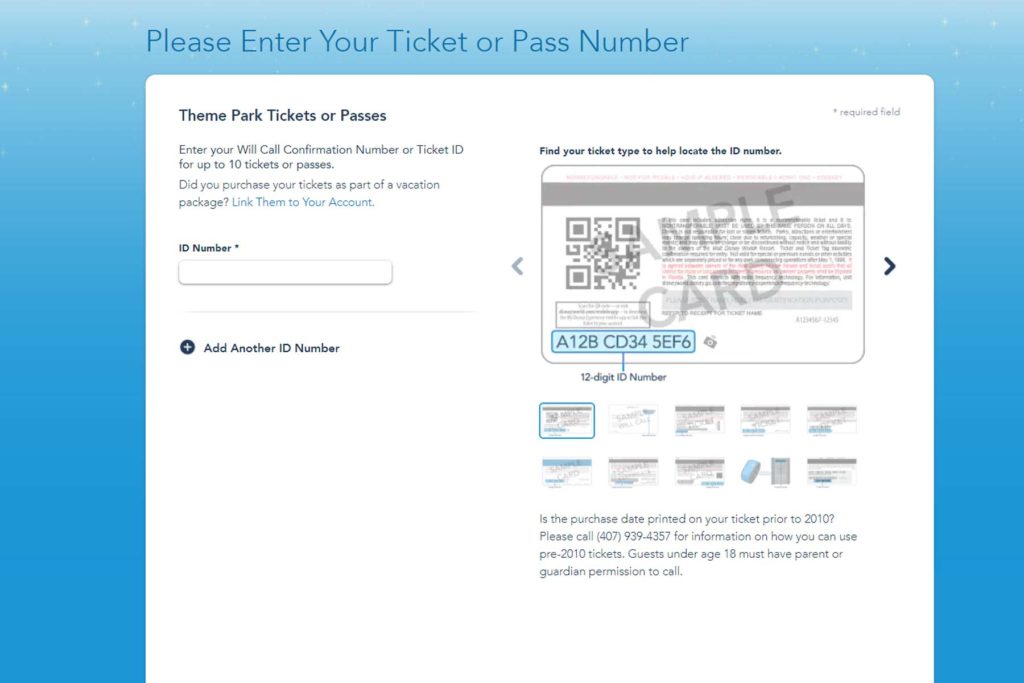
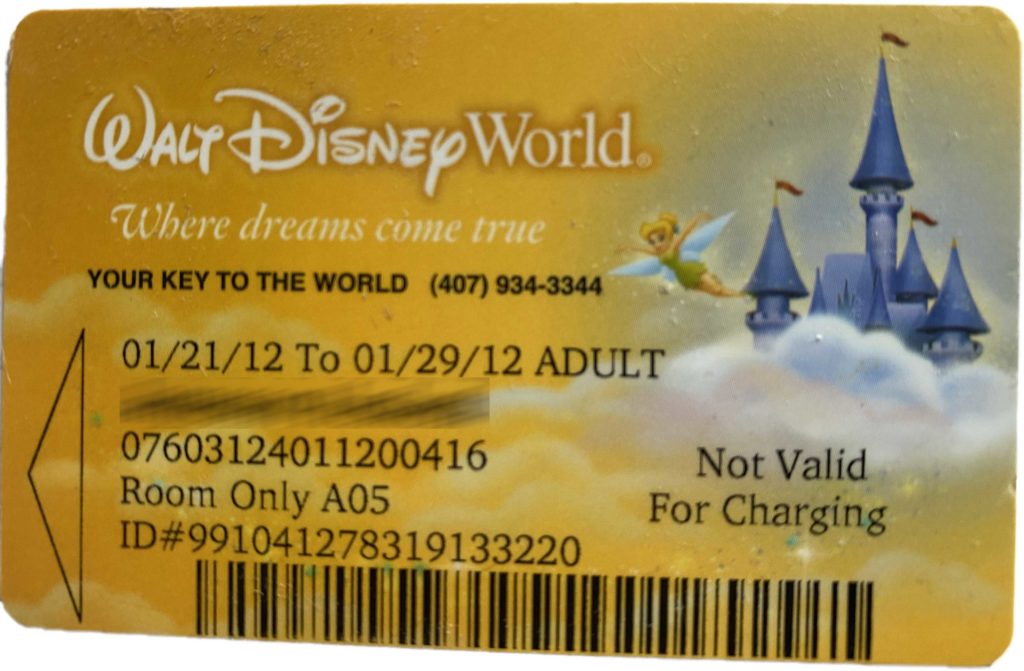
4. When linking a ticket to your My Disney Experience account, refer back to your ticket. If you booked your tickets through a travel agent, you should have received an emeail with a confirmation number. It will look similar to the image below. Note the ticket confirmation number.
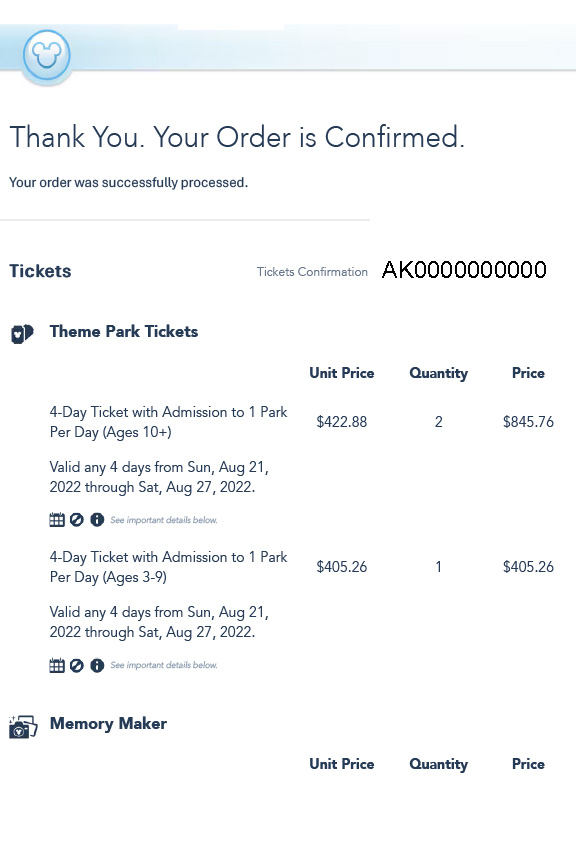
If you purchased your tickets online, you’ll need to refer to the electronic ticket sent via email or the hard plastic ticket mailed to your address, depending on the options you selected during purchase. In either case, you will again meed to locate the ticket number. If you have a hard plastic ticket, the number will be shown on the back.
5. Copy this number and return to the My Disney Experience app or website screen. Enter your ticket number. Then, click next.
6. You will then be taken to a screen where you can assign the ticket to members of your party. For instance, in the screenshot below, you will notice that three tickets are displayed. Beside each ticket is a dropdown menu. By clicking the arrow beside the word select, you are provided with a list of people who are connected to your My Disney Experience Account. Select the first individual for whom you have purchased a ticket.
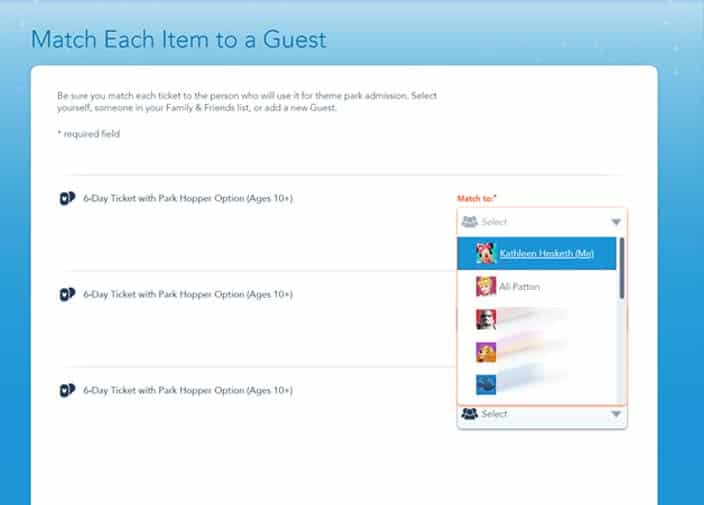
Repeat this process for each ticket you are assigning. When you are finished, you should see one name in each drop box as shown below. Click next.
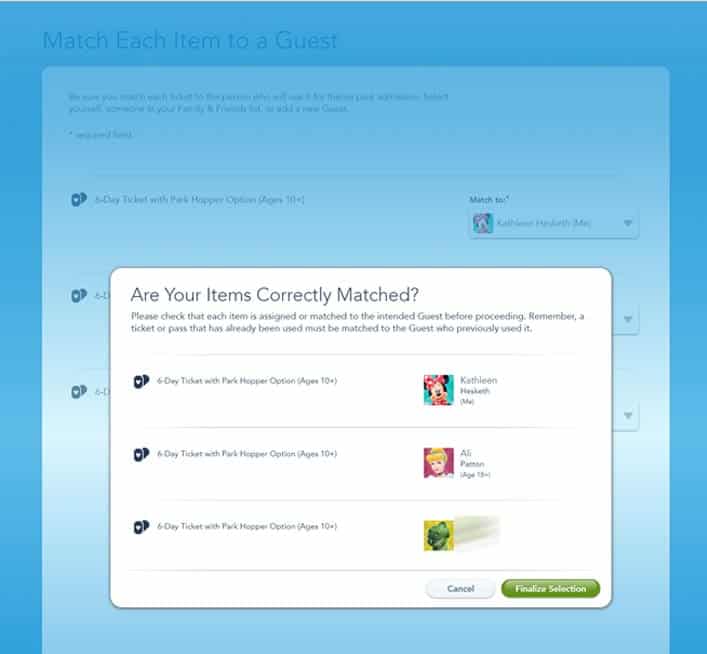
You will then be asked to verify that the individuals you have assigned to each ticket are correct. Double check the information to ensure that you didn’t inadvertently assign any tickets to the wrong individuals. Then click finalize selection.
You should then receive a confirmation screen, verifying that your tickets have successfully linked your tickets to your My Disney Experience account.
Ready to Book Your Disney Vacation?
Let us help! Free vacation planning included with every Disney vacation booking. You’ll never pay more booking with a travel agent like us, but the added insight you’ll receive could be invaluable.
Contact us for a quote today. Click here to be taken to our quote form.
Link Tickets with Your Magic Bands
Congratulations. You’ve successfully linked your tickets with your My Disney Experience account. To ensure that each Disney World theme park ticket is available for use with your MagicBand, you should take a few additional steps.
1. Locate My Disney Experience in the top bar navigation and hover over it. A drop-down list should display. From the drop down, select “My Magic Bands and Cards.”
2. Once you arrive at the screen below, you have 2 options: to purchase new MagicBands or link your existing Magic Bands. If you wish to purchase MagicBands, click on the “Get Started” button.
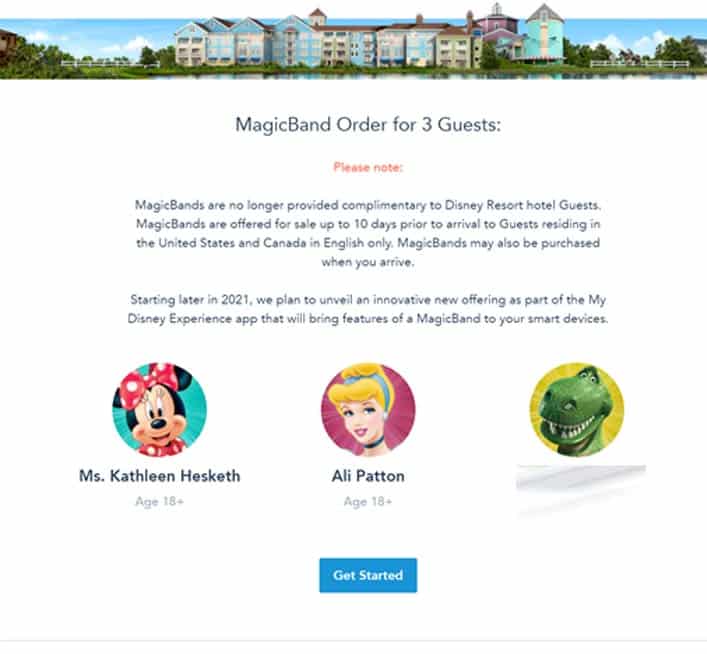
You will then be taken to a screen displaying the guests in your party. Select the first person for whom you wish to purchase a Magic Band. The list of available designs will be displayed. Designs vary in cost, so Hover over a design to see the price. Select your bands for each guest and complete your purchase.
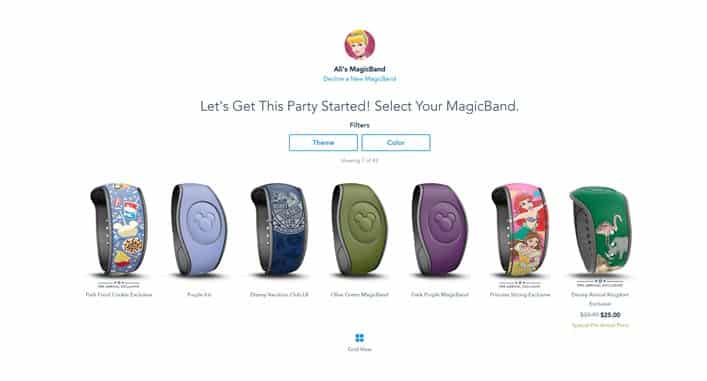
3. If you wish to link existing Magic Bands, to your ticket, scroll down to where it says “manage MagicBands or Cards.” You will see a list of guests and the number of MagicBands they currently have.
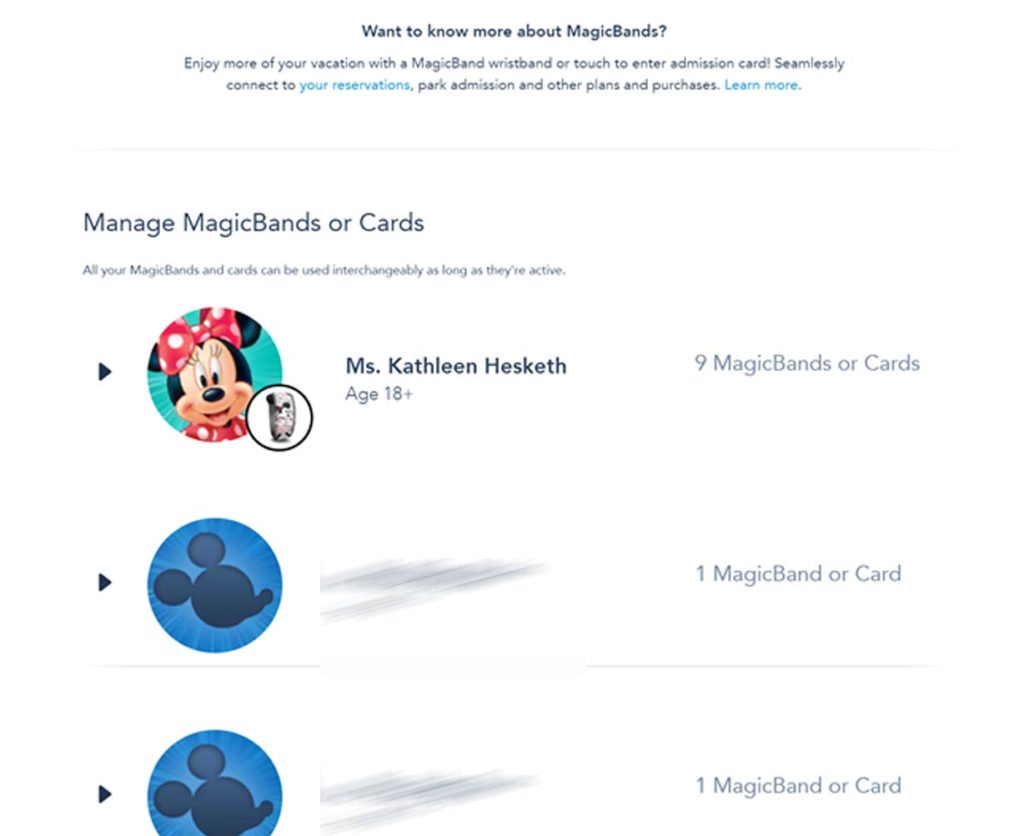
To find out which MagicBands are active and available for use, click the name of an individual in your party. A list of their MagicBands will be displayed as well as the current status of each. If the word “Active” appears next to a MagicBand, there is nothing else you need to do. Your ticket is linked to that band and ready for use.
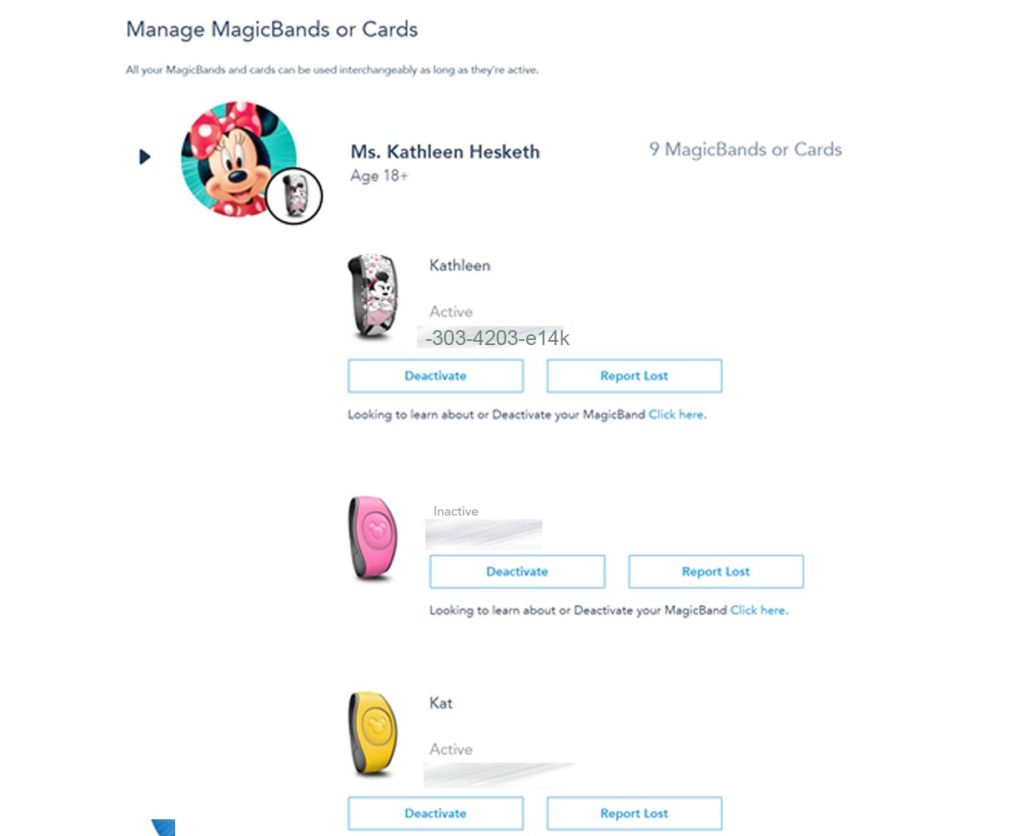
However, if you see the word, “Inactive” next to any Band or card that you wish to use, simply click the “Activate” button. Doing so will then link your current tickets.
HANDY TIP: If you’re like me, and you have a number of active MagicBands, it may be difficult to determine which ones are currently available for use. Fortunately, there is an easy solution.
A number for each MagicBand is noted on the Manage page shown above. Simply grab your MagicBands and turn them over. You’ll find a unique number listed on the back of each one.
Match the number on the back of each band to those listed on the Manage page uncer “active” or “inactive” to determine which ones are currently available for use. You can then decide if you’d like to keep it active, deactivate it or reactivate it.

Why Do I Need to Link My Tickets to My Disney Experience?
Purchasing your Disney World tickets from an authorized Disney World travel agency is a wonderful way to save time and hassle when booking your trip, but you’ll need to link your tickets to My Disney Experience to get the full functionality of Disney’s planning tools.
When you link tickets to My Disney Experience, you’ll unlock Disney’s Genie service. Here, you’ll find tools for planning your trip, including auto-generated itineraries.
Through the My Disney Experience app on your smartphone, you can review your trip details, make advanced dining reservations and take advantage of special tools designed to bring extra magic to your vacation. Most importantly, when you have your tickets linked to My Disney Experience, you can take advantage of Multi Pass (formerly Genie+) and Single Pass.
We explain this service in detail in our blog on Multi Pass, but suffice it to say, you can use this service to join a shorter queue called the Lightning Lane by booking a ride time in advance. You can also join a virtual queue on some of the more popular attractions.
Last, by linking your tickets to your My Disney Experience account, you can also take advantage of Disney MobileMagic. This service allows you to use your phone as a theme park pass. Simply scan your mobile pass at turnstiles or Lightning Lane access points to gain entry. You can also download PhotoPass photos taken on rides or within the park if your ticket is linked to your My Disney Experience account.





Pretty! This was an incredibly wonderful post. Thanks for providing this info.